Nest Says It's Heating But It's Not? (Possible Causes & Fixes)

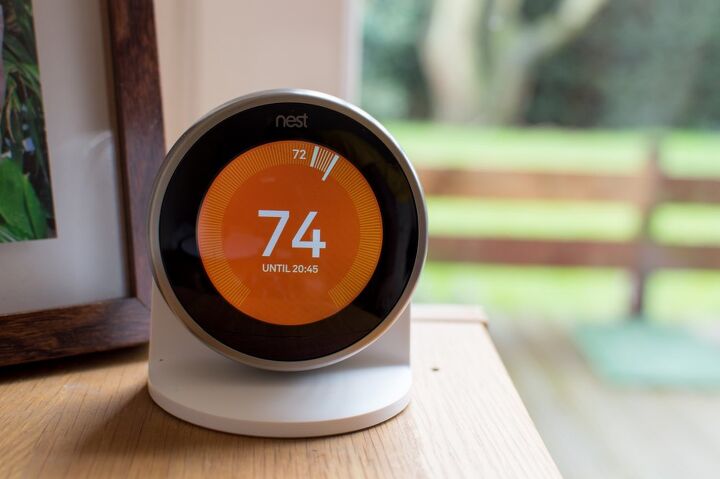
It’s hard to imagine a world without smart thermostats now that we’ve had them for several years. The Nest thermostat is among the best on the market because it is easy to program and maintain, but even it can be confusing. So, what does it mean when a Nest says it’s heating but it’s not?
A Nest says it’s heating but it’s not if the flame sensor is dirty or damaged, and you’ll need to replace it. Otherwise, it may indicate that there is a wiring problem with your HVAC system or the Nest’s C-wire. Restart your Nest thermostat to see if it works or install a C-wire if it is underpowered and unable to heat.
Make sure that there are batteries in your Nest Heat Link if you have one. Luckily, it only takes a soft restart in most cases, but you can also restore your Nest to factory settings if you have no luck. Follow along as we explore what you can do when your Nest says it’s heating but it’s not.
Do You Need Thermostat Installation or Replacement Services?
Get free, zero-commitment quotes from pro contractors near you.

Restart It
Restart your Nest if it says heating but it’s not heating your home before you do anything else. You can fix many operational errors if you restart your Nest thermostat. In some strange cases, you may need to reset your Nest to factory settings to get it to work normally again.
All that you need to do is press and hold the center ring on your Nest thermostat until the screen goes blank to restart it. The Nest should turn back on and refresh within 10 seconds, and you can see if it works properly. Program your Nest to heat and wait to see if hot air circulates throughout your house.
It is often necessary to restart a Nest after a power outage if it isn’t working accurately, but you can do it at any time. However, you can tell that something else is wrong if your Nest says it’s heating but it’s not even after you restart it.
Check the Wiring
Incorrect wiring can lead to a whole host of problems. Usually, you’ll notice a wiring issue early after installation, especially if you did it yourself. But sometimes, issues can crop up later for different reasons. Check the wiring with the following steps:
- Turn off the power to your HVAC system at the breaker panel or fuse box.
- Remove the Nest thermostat display from the wall.
- Check that all of the connector tabs with inserted wires are pressed firmly down. If the tab isn’t down, Nest can’t recognize the wire.
- You may need to re-strip and straighten the ends of some of the wires so they can be fully inserted.
Common Wiring
The chart below shows the common wire colors, their functions, and the terminals in which they should be inserted. Ensure that your wires are in their proper terminals. Note: you shouldn’t rely on color alone to determine the function of your wires.
Occasionally, users switch the heating and cooling wires. In this case, cold air might blow when your thermostat says it’s heating.
| Wire Color | Terminal | Function |
| Red | R/Rh/Rc *If you only have one wire, it can go in either the Rh or Rc terminal. | Powers your HVAC system. In systems with two wires, Rc controls the cooling and Rh controls the heating. |
| White | W/W1 | Controls heating system |
| Yellow | Y/Y1 | Controls the cooling system |
| Green | G/G1 | Controls the fan |
| Orange | O/B | Controls changeover valve in heat pump systems |
| Blue/Black | C | Provides additional power to the thermostat |
Additional Wires
It’s possible your system has additional wires to those listed above. Nest has several other terminals available that correspond to these wires.
- E terminal is for the E wire which controls your emergency heat.
- Y2 terminal is for an additional Y wire which controls the second stage of cooling in conventional systems or the second stage of your compressor in heat pump systems.
- AUX is for the wire that controls your auxiliary heat.
- W2 terminal is for an additional W wire which controls different types of heat depending on your system.
HVAC System Maintenance
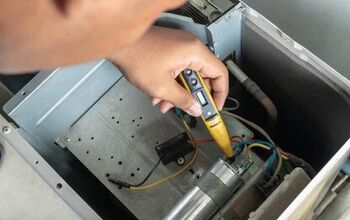
Assuming all is well with your wiring, the next place to check is with your HVAC system. In particular, Nest users have reported a dirty flame sensor as the cause of Nest’s confusion. It could be that your system simply needs maintenance.
What is a Flame Sensor?
A flame sensor is an integral safety feature on gas heating equipment. When the gas in your furnace ignites, the flame sensor allows the gas valve to open. It prevents harmful gas build-up by only opening the valve when a flame is present.
If the flame sensor is dirty or damaged, it may not be able to detect a flame. When this happens, the flame sensor tells the heating system to shut down.
Clean Your Flame Sensor- Shut off the power to your furnace at the breaker panel or fuse box.
- Turn off the gas valve.
- Locate the sensor rod in the burner assembly.
- Take out the mounting screw and carefully remove the sensor.
- Inspect the sensor for cracked or missing pieces of insulation. If this is the case, it needs to be replaced. If the insulation is intact but looks burnt, corroded, or sooty, it needs to be cleaned.
- Use sandpaper, steel wool, or a wire brush to gently lift the carbon buildup. Wipe clean with a dry cloth or paper towel.
- Replace everything and restore power to your system.
System Maintenance Check
If your flame sensor appears clean or your Nest still says it’s heating when it’s not, your HVAC system may need additional maintenance. To determine whether or not your system needs maintenance, install your old thermostat.
- Shut off the power to your furnace at the breaker panel or fuse box.
- Uninstall your Nest.
- Re-install your old thermostat.
- Restore power to the system.
If your system works correctly after installing your old thermostat, then it’s possible your Nest isn’t receiving enough power.
If after installing your old thermostat, you notice the same problems you had with Nest, your system likely needs maintenance. In this case, it’s best to call an HVAC specialist to diagnose and repair the problem with your system.
Insufficient Power
Insufficient power to your Nest can lead to a laundry list of issues. If you’ve tried all the above troubleshooting advice to no avail, you can see if additional power is the solution.
You may have noticed your system worked normally after installing your old thermostat. This obviously leads to the conclusion that Nest is the problem. And many of Nest’s problems can be solved by adding an additional power source.
You have two options: install a C wire or install a Nest Power Adapter.
Installing a C Wire
While you don’t need a C wire for Nest to work, many users find their problems disappear after installing one. It’s likely a C wire isn’t the exact solution when Nest says it’s heating but it’s not. However, it could prevent other problems down the line.
You may already have a C wire. Most thermostats require one, so it’s possible you have an unused C wire in the wall. If this is the case, either uncap or strip the wire to reveal the copper. Then, insert it in the C terminal on your Nest’s base plate. Make sure to press the connector tab firmly down.
If you don’t have a C wire, you can install one yourself or have a professional install one for you. A simpler solution might be to install a Nest Power Connector.
Install a Nest Power Connector
Before you install the Nest Power Connector, perform any necessary updates to your Nest thermostat. Install the power connector to the furnace or air handler for homes with only one thermostat. Install the power connecter at the zone controller for homes with a zoned system.
The power connector has wires that go to the thermostat and ones that go to the HVAC control board. The wires going to the control board are C, R, and W/Y.
The wires going to the thermostat are another R wire and another W/Y wire. Insert these wires into the wire connectors provided—R in one connector and W/Y into the second. Insert the corresponding thermostat wires into the connectors (i.e. R from the thermostat in the same connector as R from the power connector.)
Nest recommends having a professional install a power connector. But they do provide detailed instructions with pictures so you can do it yourself.
Why is my Nest Not Turning the Heat On?
Your Nest won’t turn the heat on if the Heat Link function stops working. The Heat Link feature on a Nest thermostat allows you to control the heat. Nest thermostats won’t communicate with your furnace to turn it on if the Heat Link disconnects from the thermostat and HVAC system.
Press the Heat Link button once or twice to reconnect it and control the heat. Replace the batteries in your Heat Link if you cannot control your furnace with your Nest thermostat.
Related Questions
Why does my Nest delay heating?
Many HVAC systems employ a built-in delay as a safety feature. If a system turns off and on frequently, the lifespan is shortened. The delay, which should only be a few minutes, is there to prevent excessive wear on the unit. So really, this delay is coming from your HVAC system, not Nest.
Why is my Nest thermostat not heating?
First, make sure your thermostat is in heat mode. It’s possible there’s a wiring issue as mentioned above. If you’ve switched the heating and cooling wires during installation, the opposite temperature will blow.There could also be an issue with your HVAC system. Your air filters may be dirty or your furnace might be overheating.
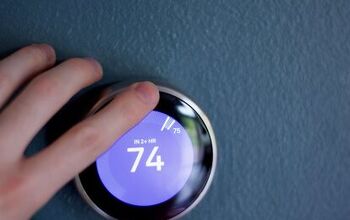
Why does my Nest say “In 2+ hours?”
This message is Nest estimating how long it will take to achieve the target temperature. For example, let’s say your current temperature is 68° at 5:00, and you adjust it to 70°. Nest estimates that you’ll reach the target temperature of 70° by 7:00. This feature is in place to avoid excess strain on your HVAC system.
Do You Need Thermostat Installation or Replacement Services?
Get free, zero-commitment quotes from pro contractors near you.


Brigid Levi is a wife, mother, and freelance writer who enjoys a good DIY project and creating beautiful spaces within her home. From cleaning and organization hacks to home decor ideas, she loves helping people in their quest to turn a house into a home. Her hobbies include pretending to be Joanna Gaines while updating her home with her husband and performing in local theater productions.
More by Brigid Levi








![10 Most Dangerous Neighborhoods in Baltimore [Updated]](https://cdn-fastly.upgradedhome.com/media/2023/07/31/9075655/10-most-dangerous-neighborhoods-in-baltimore-updated.jpg?size=350x220)