Ice Maker Making Ice But Not Dumping? (Here's Why!)

An ice maker is a godsend for many homeowners. Gone are the days of having to constantly refill ice trays, make ice batches ahead of time for a barbecue, or buy bags of ice from the store just to have enough for parties. If you use your ice maker on a daily basis, it’s unlikely that you’ll ever have issues with the ice not dispensing. Though, when winter rolls around and the ice is no longer needed, people tend to start having problems with ice getting stuck.
Ice is one of the greatest luxuries of our modern world, so when your ice maker is making ice but not dumping it, this can be a real inconvenience. If your fridge has stopped ejecting ice, there are a number of different possible causes including ice clumps in the bin, a worn-out dispenser or ejector, stuck ice in the raker, a clogged dispenser, frozen auger motor, and jammed chute.
Fortunately, a stubborn ice maker isn’t the end of the work and, in many cases, is something that can be quickly and easily fixed. Continue reading to learn how to fix your ice maker that won’t dump ice and prevent this issue from occurring again.
Do You Need Appliance Repair Services?
Get free, zero-commitment quotes from pro contractors near you.

Simple Causes & Solutions
Before we dive too deeply into what may be causing your ice maker to not dump ice cubes and how to fix it, try these simple solutions!
- An error has occurred and the ice maker needs to be reset – Press the reset button.
- An unknown error has occurred – Unplug the fridge for 5 to 10 minutes to allow the ice maker control board to reset.
- Ice cubes have collected in the bin and caused the ice maker to shut off – Level and break up the ice.
- An ice cube may be stuck in the ice mold tray – Clear the ice tray.
- Your freezer isn’t cold enough to complete the production of ice – Check the freezer temperature.
Note: For optimum ice production, your freezer should be set between 0 and 5 degrees. Though, this may vary based on your manufacturer so always consult your owner’s manual for specifics.
1. Ice Cubes Stuck in the Tray
The ice maker tray in your refrigerator’s ice maker is designed to tip and clear ice cubes until the bin is full. However, there are some instances where the ice doesn’t get dumped completely or come out at all. This usually occurs when broken ice cube pieces form jagged ‘sticky’ remnants in the ice tray.
You’ll be able to tell if this is the cause of the problem by taking a look at the ice tray. If the tray hasn’t been emptied and the bin isn’t full, then something is awry. When this happens, you may notice that a row of cubes hasn’t cleared or the presence of malformed ice cubes like partially filled compartments or shards.
Fortunately, this problem is an easy fix! All you’ll need is a cup of warm water and a cup of white vinegar. Start by pouring warm water into the ice tray compartments that have lingering ice. This may be enough to correct the problem. If it’s not, slowly pour the vinegar into the tray. Vinegar is excellent at melting ice and will essentially do the same thing that you were hoping the warm water would do.
2. Ice Clumps in the Bin
One of the most common causes of an ice maker that won’t eject ice is the presence of an ice clump inside of the bin. In order for the ice cubes to be dispensed out of the mold, a small amount of heat is discharged to slightly melt them. This heat, along with the heat that enters from opening the freezer drawer, can also melt the ice in the bin.
Although the auger is responsible for freeing these ice cubes from each other, if you don’t use your ice maker on a daily basis, the auger won’t even turn on. Then, over time, you’ll have large chunks of ice forming in the bin. When you have an issue like this, you’ll often hear the auger attempting to break up the ice – indicated by grinding sound that is louder than normal and possibly some ice shards being dispensed.
In order to correct this problem, you need to remove the ice chunks in the bin. If the ice has formed a sizable mass, this process can be rather challenging. In some cases, you may have to remove the entire bin or potentially defrost the whole ice maker. Though, it may be as simple as breaking up these large ice chunks with your hands or tossing them into the sink to melt.
Find out what you should do if your GE ice maker isn’t working.
3. Ice Stuck in the Raker
Although not every ice maker is outfitted with a raker, this is one of many components that ice can get caught in. The raker’s job is to rake through the ice cubes and evenly distribute the new ones in the bucket. It also helps to prevent ice chunks that can clog the entire system. However, if an ice block is created or the ice cubes catch in an odd way, they can stop the raker from functioning.
When the raker becomes jammed, it prevents your fridge’s ice maker from ejecting ice. The fix for this issue is typically to go in and remove the ice that’s clogging the raker arm by hand. Upon inspection, the raker arm will be visibly stuck which makes it easy to identify and correct the problem. In some cases, the raker may get stuck because there is too much ice in the ice maker. To correct this, all you need to do is remove the excess cubes.
4. Clogged Ice Dispenser
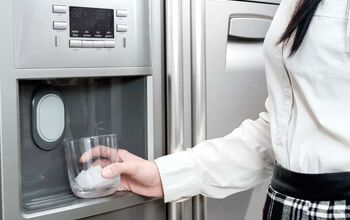
If the ice maker is forming in the trays properly and being dumped into the bucket but not being ejected from your fridge, the problem is likely occurring with the chute or dispenser system. The chute is where the ice gets dumped from the bin into a hatch that delivers to your cup.
When your cup is placed under the dispenser, ice is constantly dumped until you pull the cup away. When the ice stops, there may still be some ice leftover in the chute. If this happens, the remaining ice may melt, due to exposure to warmer air outside of the dispenser, and then freeze again to clog the chute. What’s causing the traffic jam is essentially several ice cubes that have refrozen together and formed a large chunk that doesn’t allow any other ice to pass through.
In some situations, the ice cubes just went down the chute wrong and clearing this jam may be as easy as using prods to break it free. However, if you have a pretty extensive ice chunk lodged in there, you’ll want to try a different method:
- First, place a large unbreakable cup under the ice dispenser.
- Open the freezer door and locate the top of the chute. Pour a cup of warm water into the chute and wait a couple of seconds.
- Test the dispenser to check if this freed the jam.
- If not, hold the lever on the dispenser so that it stays open and use a long-handled end of a wooden spoon to break apart the ice chunks in the chute.
- Keep working and eventually, pieces of ice will start to fall in the cup.
- Once the jam is cleared, clean the chute with warm water and dry it completely will a cloth before attempting to test the ice again.
5. Frozen Auger Motor
Sometimes when your ice maker doesn’t get used for quite a while, the cold temperature can cause the auger motor to freeze. The auger motor is located behind the freezer wall and when it can’t spin, new ice cubes will not be dispersed to the chute.
When you have a frozen auger motor, keep the dispenser lever depressed. This will kick on the auger motor and as it runs, it will get warm and start melting the stuck ice. Although this is a quick fix, it is very hard on the motor itself.
To prevent it from happening again and causing further damage to the motor, you should determine how moisture got behind the walls of your freezer to the auger motor in the first place. Check out Samsung Water Dispenser Not Working After Replacing Filter?
Do You Need Appliance Repair Services?
Get free, zero-commitment quotes from pro contractors near you.

6. Worn Out Dispenser or Ejector
In addition to the auger motor, there are a number of electrical and mechanical components that are responsible for dispensing ice. The dispenser assembly is related to the sensor button that requests ice, which prompts the ice chute to open and close. Whereas, the ejector assembly has to do with how the ice cubes are formed and then dumped into the ice bin.
If your ice maker is making ice but not dispensing it, even with little to no ice in the bin, you could have an issue with either system. However, it’s more likely that the problem exists with the ejector system than the dispenser system. Regardless, if either the dispenser or the ejector is worn out, you may need to consult the help of a professional appliance repair team to assess the problem and find a solution.

Jessica considers herself a home improvement and design enthusiast. She grew up surrounded by constant home improvement projects and owes most of what she knows to helping her dad renovate her childhood home. Being a Los Angeles resident, Jessica spends a lot of her time looking for her next DIY project and sharing her love for home design.
More by Jessica Stone









![12 Washing Machine Brands to Avoid [with Recall Data]](https://cdn-fastly.upgradedhome.com/media/2023/07/31/9075781/12-washing-machine-brands-to-avoid-with-recall-data.jpg?size=350x220)


