How To Harden Asphalt Millings

So you’ve decided to use asphalt millings for your next DIY paving project. Great choice! Asphalt millings are an environment-friendly, relatively cheap, and effective solution for your paving needs. If you’re reading this guide, you’ve probably done your research and have decided to use asphalt millings, but now you may be wondering how to harden the asphalt millings after spreading them properly. The good news is it is simple.
To harden asphalt millings, compact them with a steamroller, allowing for 45-degrees at the edges for proper runoff. Make sure the steel drum of the roller is wet so the millings don’t stick to the drum. Let the pavement cure for at least 24 hours and then seal it with a layer of chip-seal mix.
Read on for a step-by-step guide to installing pavement with asphalt millings, asphalt milling benefits, alternatives, how long it takes for asphalt millings to harden, and our recommendation on the whole “diesel fuel on millings” debate. This guide has everything you need to know to harden your asphalt millings for paving.
Do You Need Gravel and Loose Paving Installation or Repair?
Get free, zero-commitment quotes from pro contractors near you.

A Step-By-Step Guide To Paving With Asphalt Millings
- Prepare The Site. Ensure the proposed area is appropriately graded to allow water to a runoff in the desired direction. To do this, you will need to know which side naturally slopes more. Then, grade your area accordingly. Remember, it doesn’t need to be extreme, but it needs to be enough to allow the water to run off.
- Compact the soil. You will then need to compact the existing soil so that you can spread a new base layer of road-grade gravel. Then, you’ll need to let the gravel settle for a few days before moving on.
- Inspect millings closely. After the gravel has settled, you need to check the millings. Ensure that your milling is fine and no piece is larger than 2 inches in diameter. If they are, you will need to take the time to crush them smaller.
- Add emulsion. (Emulsion is a mixture of asphalt and water that will help bind the material together.) Your millings supplier should know how to prepare the millings this way and deliver it to your prepared site. So, you don’t need to worry about preparing, but just applying.
- Distribute the millings. Use a bobcat to spread the material across your desired pavement area. Use the bobcat’s rack to smooth and level your material. You’ll need to keep the area level because you need to compact them as well. If they’re not level, there’s a chance that it can cause the other areas to decompress when you compact that particular area.
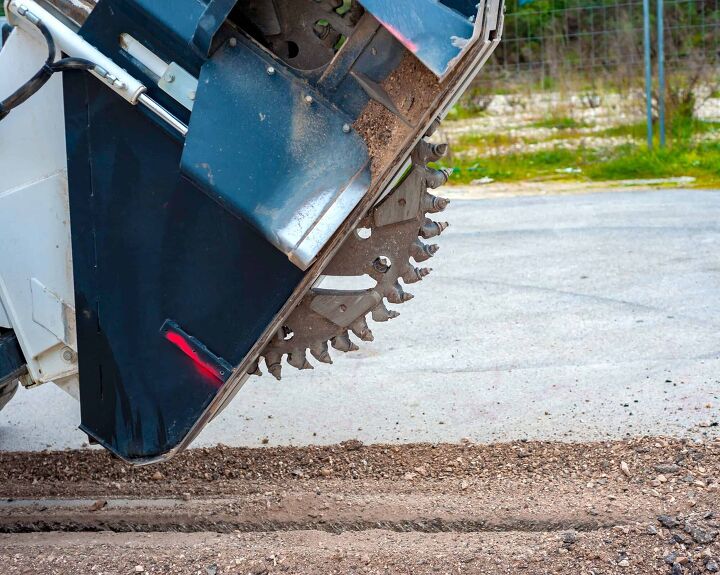
- Compact the millings. Be ready with a rented drum roller to compact your material. Aim for 45 degrees along the edges to ensure proper runoff.
- Wait 24 hours. Leave your pavement to cure for a day.
- Seal. Seal with a layer of chip-seal mix.
How Long Does It Take For Asphalt Millings To Harden?
After spreading and compacting your millings, leave it to cure for 24 hours. A great thing about asphalt millings is they will actually continue to harden beyond 24 hours as well. However, letting it sit for the initial 24 hours will help it to help the initial stages of hardening, so then it can then harden correctly over time.
Benefits Of Asphalt Millings
Asphalt millings (aka recycled asphalt) provides many benefits over traditional asphalt. First, it is cost-effective. A 600 square foot driveway paved with conventional asphalt can run you about $6,000 in materials, whereas a driveway paved with asphalt millings will cost in the range of $115!
(Note that this is the cost of materials. The project will also require rented equipment and delivery of materials. Final prices for a recycled asphalt driveway usually range from $3,000-$6,000.)
Second, they require little maintenance. Unlike traditional asphalt, which requires resurfacing and resealing, asphalt millings will last 20-30 years without these treatments. It is also more resilient than gravel. Finally, it is environmentally friendly because you are using recycled materials that would otherwise go to a landfill.
Asphalt Millings Is Not Made For Weight Bearing
Keep in mind that the asphalt millings are not weight-bearing. This means that you cannot drive a vehicle on it or park any that’s heavy. Well, aside from the roller that you’ll drive on, it to compact. If you’re looking for something that’s load-bearing, you will need to install some actual pavement and have your soil graded so you can take care of what you need to beforehand.
Asphalt Millings Alternatives
Driveways are usually paved with these five popular materials:
- Gravel
- Asphalt Millings (aka recycled asphalt)
- Traditional Asphalt
- Concrete
- Pavers
Each material comes with pros and cons in installation cost and upkeep.
In order of most to least expensive in installation cost:
- Pavers: Requires the least amount of maintenance
- Concrete: Most amount of maintenance
- Asphalt: Less maintenance than gravel, but more than the rest
- Recycled Asphalt: Average amount of work to maintain
- Gravel: Not much to maintain
More Information About The Alternate Choices
Pavers
Pavers are known as ‘patio stones’ and are frequently used in patios as well as walkways. The great thing about pavers is that they’re cheap, but you can use them to create a pattern on the patio or sidewalk that you’re laying. So, it’s very pleasing to the eye as well as the pocketbook. Pavers cost, on average, about $13 per square foot. However, the cost will differ depending on the type you purchase, as well as the location.
Concrete
Concrete is a mixture of coarse and fine aggregates. The mixture is then bonded together using liquid cement. When choosing concrete, you can choose between different kinds. For instance, if you’re wanting to pour plain concrete yourself, this will cost significantly less than purchasing stamped concrete. If you choose regular concrete to pour yourself, then this will cost between $5 to $10 per square foot, while stamped concrete costs $8 to $18 per square foot.
Asphalt
Asphalt is installed easier than concrete. However, it’s not as strong. Asphalt is also usually cheaper than concrete as long as you don’t factor in the maintenance cost. But, with the cost of maintenance, it will end up being more expensive than concrete. You can expect to pay between $2.50 and $4 per square foot for asphalt. The reason it’s cheaper than concrete is because it’s a component in concrete and not as strong.
Recycled Asphalt
This product, more or less, is removed asphalt. So, let’s say someone is repaving a road; they will generally remove the asphalt and break it down. You’re buying broken down the road when you’re using recycled asphalt. But it’s excellent! It’s wonderful for walkways and patios.
Recycled asphalt is exceptionally cheap, at about $7 to $60 per ton. However, the cost is hugely inflated because you also have to pay the delivery fee, and then rent equipment to move it to the location in which you want to pave.
Gravel
The cost of gravel is about $1 to $3, which is the cheapest to use. However, it’s incredibly non-weight bearing, so keep in mind if you’re using gravel for a driveway, the pebbles will shift. Also, you will need to have your soil graded to make sure that you can drive vehicles on it in the first place.
What Should You Use?
What you choose depends on what you’re trying to accomplish. Asphalt millings function better than gravel does because of it’s the ability to bond after being compressed. However, it’s not going to be as strong as pavers or concrete. Therefore, if you need something substantial than asphalt millings, it’s a great idea to choose an alternative. But, if not, then asphalt millings are great and perfectly fine to use when creating a patio or walkway.
Related Questions
Where do asphalt millings come from? What are they?
Older asphalt roads are refreshed every once in a while, by milling off at least the top layer, revealing a fresher layer underneath.
The resulting millings are still useful and are repurposed into “asphalt millings,” a cost-effective material and solution for your pavement needs.
Should I spray diesel fuel on asphalt millings to “improve results”?
We advise against using diesel fuel to treat your asphalt millings.
The reasoning is it will weaken your material. It is well-documented that diesel fuel dissolves asphalt tar. Dissolving the material will only undermine the resulting pavement.
Note that there are YouTube videos out there that recommend the practice of adding diesel fuel, but we conclude if you don’t have to do it, then there is no reason to do so.
Will my asphalt millings require maintenance?
No. Your asphalt millings will actually strengthen over time as the material bonds tighter with compaction and heat. It will last 20-30 years and is fairly durable to temperature and weather.
If your asphalt driveway is currently deteriorating and you would like advice on improving it, click here.
Do You Need Gravel and Loose Paving Installation or Repair?
Get free, zero-commitment quotes from pro contractors near you.

Our Takeaway
Overall, asphalt millings are great when you want to create a more or less ‘paved’ space. But they’re not always ideal if you’re looking at using them for a larger project, such as creating a driveway. That’s not to say they’re not usable for driveways, as long as you get your soil graded before installation. However, to do this, you will need to harden the asphalt millings by compressing them so they can bond. The millings should be hardened no matter what project you are using them for.
Related Guides

We are a team of passionate homeowners, home improvement pros, and DIY enthusiasts who enjoy sharing home improvement, housekeeping, decorating, and more with other homeowners! Whether you're looking for a step-by-step guide on fixing an appliance or the cost of installing a fence, we've here to help.
More by Upgraded Home Team






![10 Best Cordless Leaf Blowers – [2022 Reviews & Ultimate Guide]](https://cdn-fastly.upgradedhome.com/media/2023/07/31/9070789/10-best-cordless-leaf-blowers-2022-reviews-ultimate-guide.jpg?size=350x220)


